
Grab a cold one, settle in. Today we’re picking up right where we left off. You’ve already crushed the first 10 steps: measured the crap out of your space, set a realistic budget, figured out if this is for Netflix binges or epic game nights, researched gear without impulse-buying everything, sketched seating ideas, thought about acoustics and lighting basics, mapped wiring, checked codes, gathered tools, and got some sanity checks from the crew. Solid work. You didn’t wreck your walls or wallet yet.
Now it’s time to stop dreaming and start committing. This is the Detailed Design & Final Prep phase—the bridge between planning and actually swinging hammers. Let’s walk through it, no fluff, just the real next moves you should make over the next week or two.
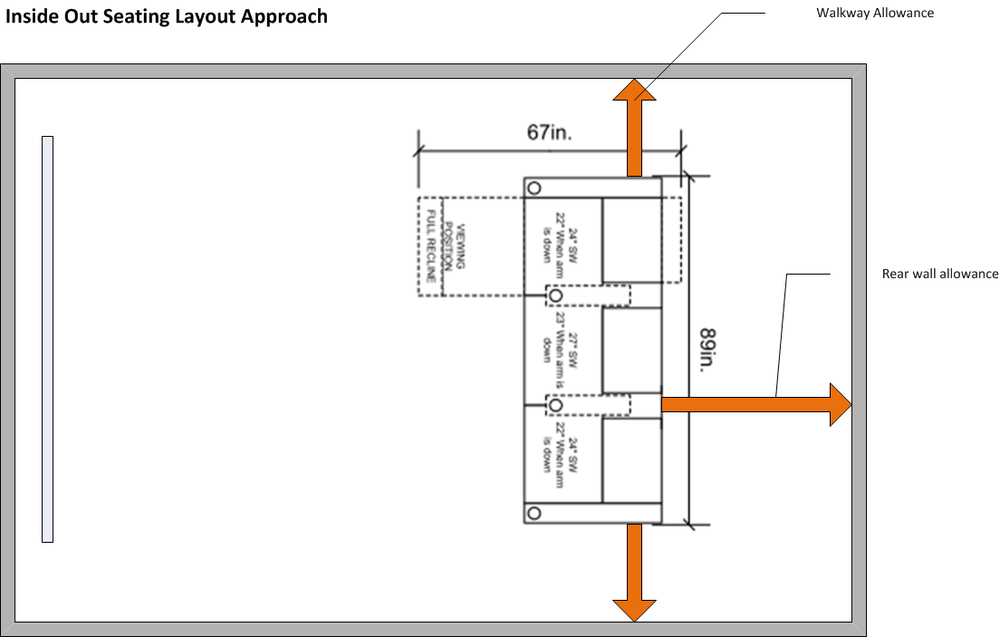
First up—and this is the absolute must-do—lock in your detailed room layout.
Take that rough pencil sketch and make it precise. I use the free web version of SketchUp because it’s dead simple, but RoomSketcher works great too, or hell, graph paper at ¼ inch equals a foot if you’re old-school like me.
You gotta nail:
- Exact spot for the screen or projector (use an online throw-distance calculator if you’re going projector—trust me, guessing sucks)
- Every single seat position with proper viewing angles—no more than 30–40 degrees off-center or your neck will hate you after two hours
- Speaker spots: front left/right/center at seated ear height, surrounds a little behind and higher
- If you’re doing multiple rows, sketch in simple riser platforms
- Cable paths, extra outlets you need, where the acoustic panels will live, and bias lighting strips
Here’s what good finalized layouts look like when real DIY guys do it right:


Once it’s drawn, mock it up in the room with painter’s tape on the floor for everything—screen edge, seats, walkways. Stack cardboard boxes for seat height. Sit in every spot, pretend you’re watching the Vikings game or Oppenheimer. You’ll spot dumb stuff immediately—like “oh crap, I can’t get to the mini fridge without climbing over Uncle Dave.” Fix it with tape. Costs nothing, saves thousands later.
Okay, layout locked? Good. Next: commit and buy the core gear.
This is where you pull the trigger on the big stuff:
- Your display—projector + fixed screen for that true theater feel, or a big 75–85″ OLED/LCD if you want easy
- AV receiver (the heart—make sure it has enough HDMI 2.1 ports for future)
- Speakers—start with a solid 5.1 setup, add a second sub later if you want real rumble
- Cables—HDMI 2.1, in-wall rated speaker wire, Ethernet if you’re running network
- Streaming box—Roku, Shield, whatever you like
Shop sales on Crutchfield, Best Buy, Amazon. Read the return policy—I’ve sent back two receivers because they sounded like crap in my actual room. And since we’re in Benson, Minnesota, winters are bone-dry—toss a cheap little dehumidifier on the list (~$60) so your gear doesn’t sweat when spring hits.
Now, while you’re waiting on deliveries, plan the details you actually need to think about right now: acoustics, lighting, wiring.
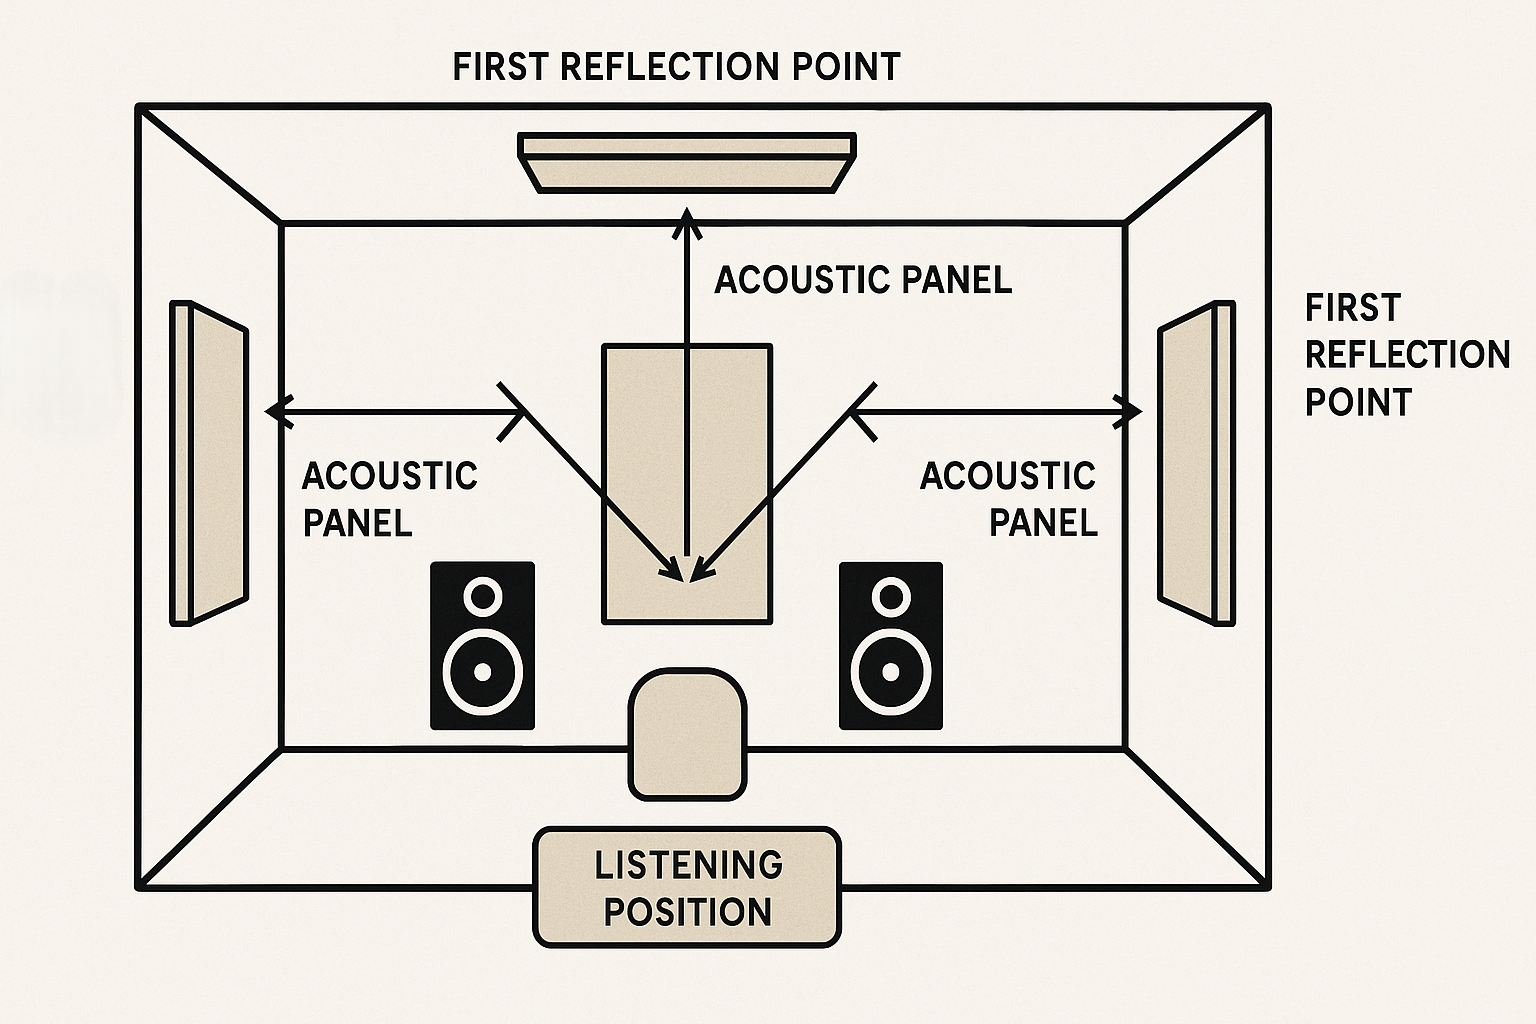
Acoustics—don’t overthink it yet, but decide placement. Panels at first reflection points (side walls and ceiling), bass traps in corners. DIY rockwool + fabric is cheap and works great. Here’s how real setups place them:
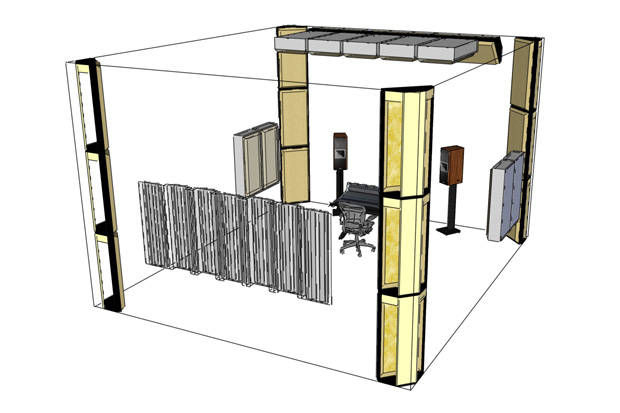
Lighting—bias lighting behind the screen is non-negotiable for eye comfort and deeper blacks. Cheap LED strips, dimmable, done. Check these examples:

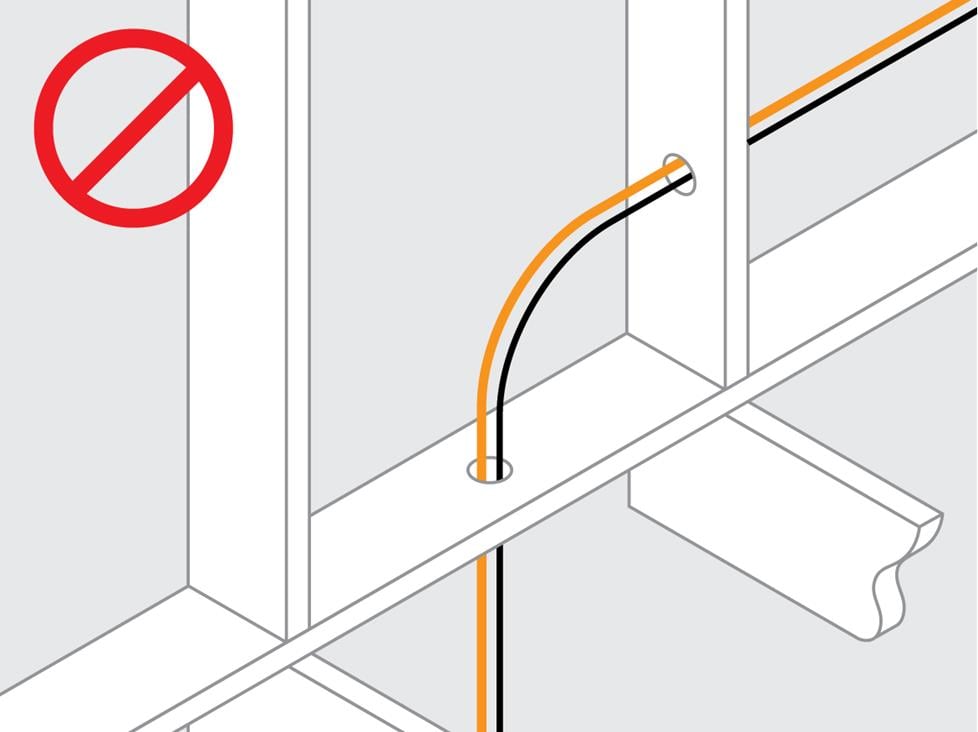
Wiring—finalize runs now. Conduit for future-proofing, dedicated circuit if you can swing it. Label everything. Clean examples:
If you’re doing risers for multi-row seating, build them now—simple 2×8 framing, plywood top, carpet. Easy weekend project, huge upgrade. Real DIY builds:


Quick sanity check: post your layout pic in the group or on r/hometheater/AVS Forum—ask “does this suck?” You’ll get gold feedback. Then call Stevens County building folks—most theater stuff doesn’t need permits, but electrical might. Ask now, not later.
What don’t you worry about yet?
- Fancy $3k acoustic packages—start basic, upgrade later
- Final speaker mounting or wire pulls—wait till drywall’s done
- Paint colors or wall finishes—acoustics might change your mind
- Super-precise calibration—that’s the very last step
- Buying all the seating—unless risers are locked
Focus here: layout + mockup, buy core gear, plan acoustics/lighting/wiring basics, build risers if needed, get feedback + check permits. Do this and you’re cleared for demo, framing, drywall, and install.
That’s the sweet spot, fellas. Real progress, no expensive screw-ups.
Drop your layout pics or questions in the Facebook group—I’ll be in there giving feedback. If you’re digging these step-by-step episodes, share ’em and leave a review—helps other DIYers find us.
Until next time—measure twice, buy smart, and keep those walls intact